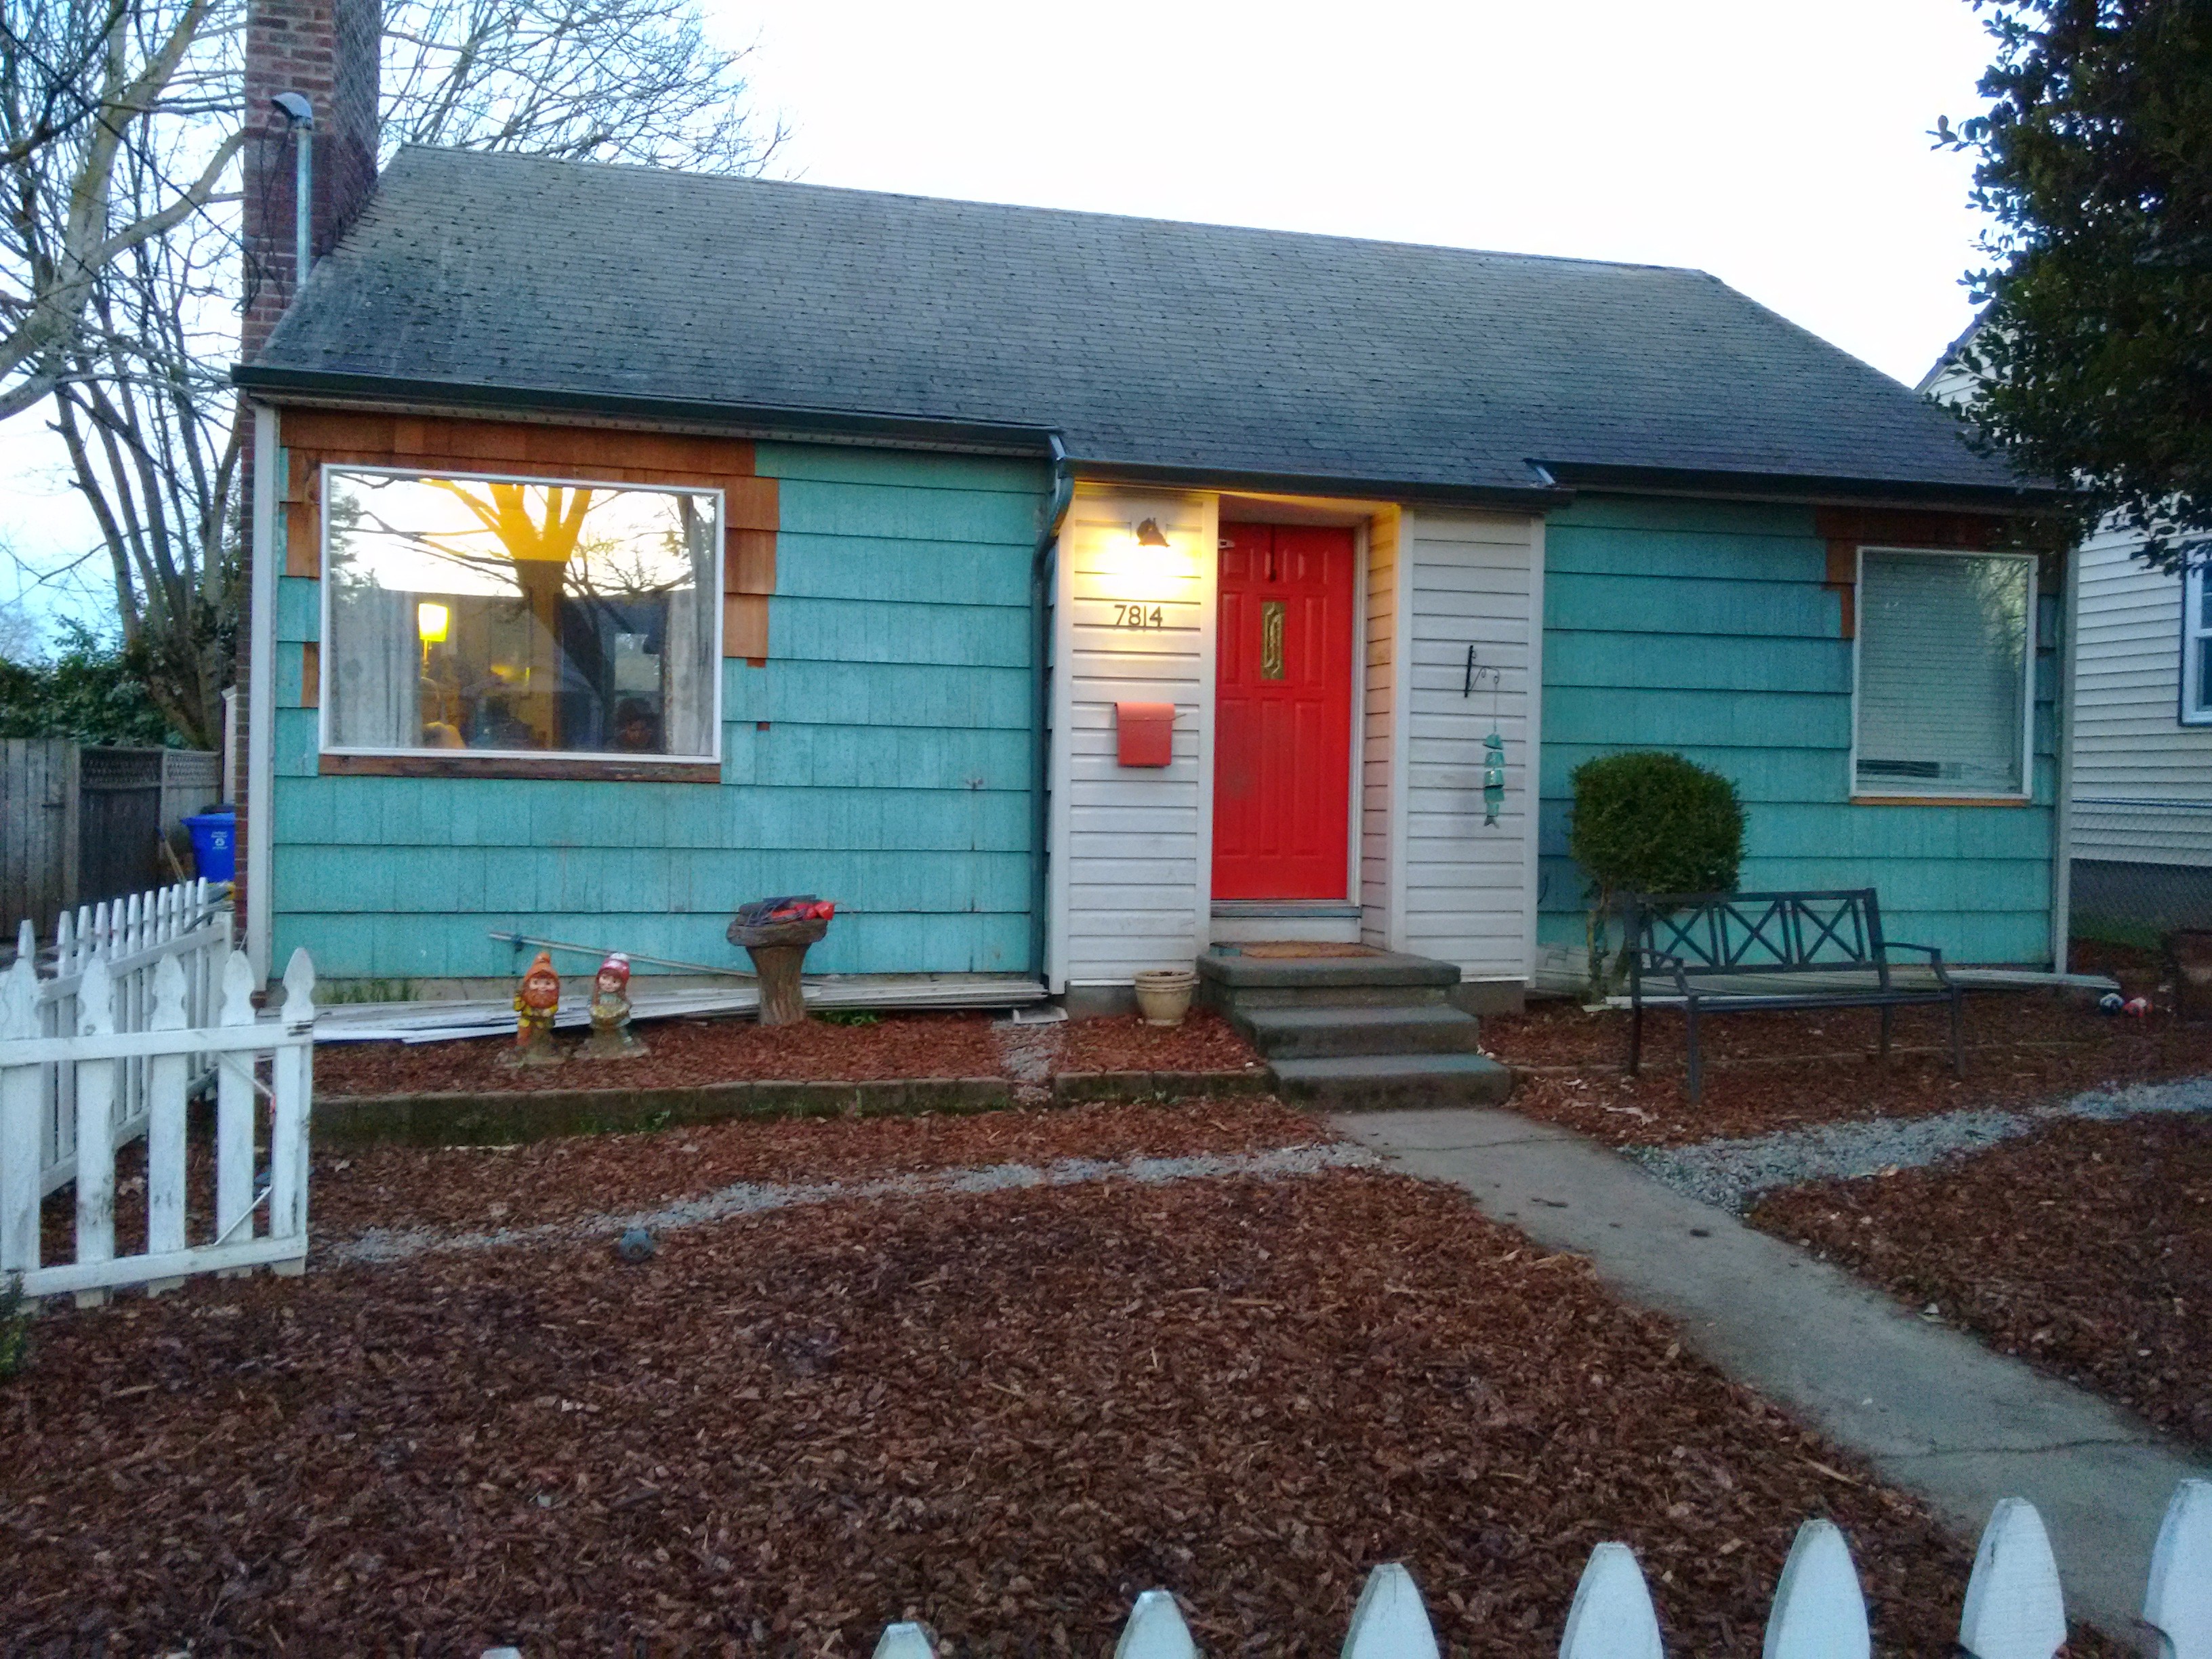
My wife and I bought a 1950 house in 2013 that suffered an unfortunate series of lobotomizations in the 90s. Vinyl windows were installed in 1998—I found some date labels on them. There's no way to know for sure when the vinyl siding was put up, but it was likely at that same time. The old windows and trim were tossed out and the vinyl siding was run right up to the vinyl windows with no trim except vinyl J-channel. We knew when buying it that we really needed to do something to the exterior to fix its depressing demeanor.

How the house looked when we bought it—2013
vinyl removal
We started tearing off vinyl and fanfold (1/4" thick extruded polystyrene foam that is often installed under vinyl) and found the original grooved cedar shingles that were in passable shape, in a pretty sweet green-blue color. We laid down plastic to catch lead paint chips, and vacuumed the siding and the removed materials with the brush attachment on an EPA RRP certified lead-safe HEPA vacuum (Vacmaster VK811PH). It's the cheapest certified HEPA vac I could find and had good reviews on Amazon, and I'm happy with it. Anyone who works on a pre-1978 house should have a certified HEPA vacuum and use it religiously when disturbing old paint. There were a lot of spider egg sacs, cobwebs, dust and various debris on the old siding after years of being covered up. We then filled nail holes with MH Ready Patch, and encapsulated the lead paint with Zinsser Peel Stop Triple Thick—one coat thinned with 10% water, and a second coat unthinned, followed by Benjamin Moore Regal low lustre. We matched the color to BM's historic color Mill Springs Blue. With the primer tinted (and very thick), one coat of paint was all we needed.
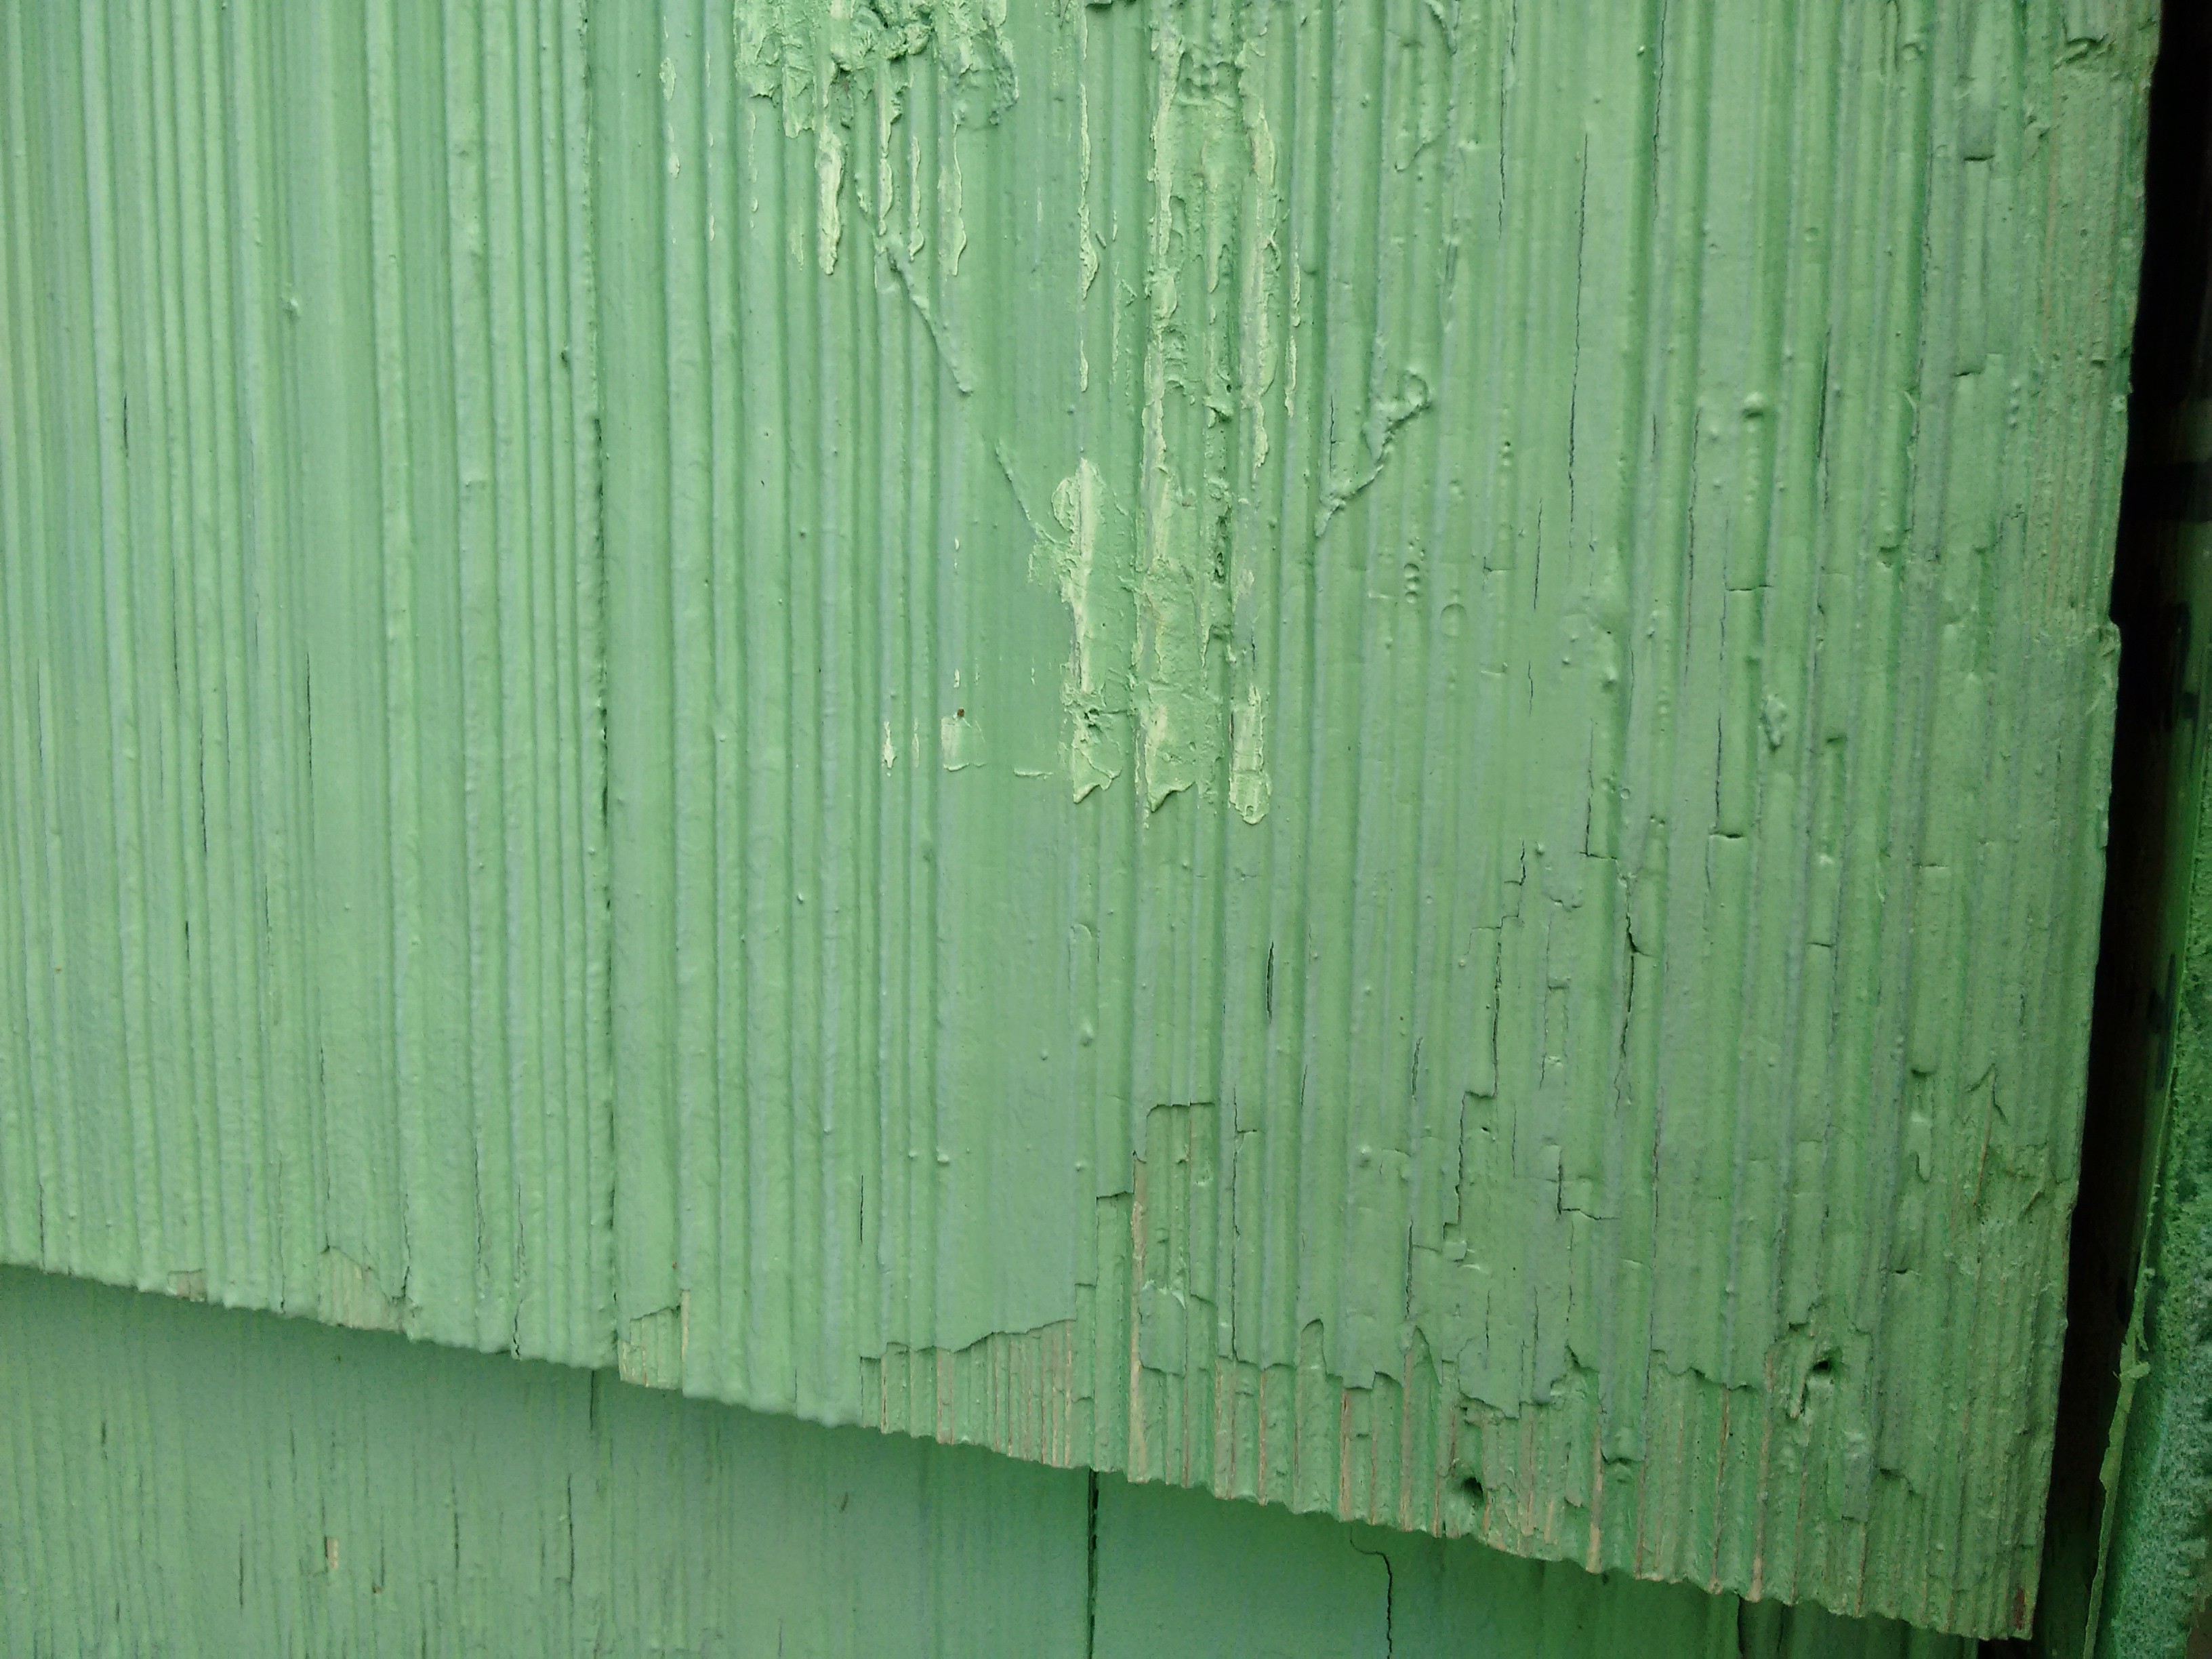
grooved cedar shingles
The grooved cedar shingles are often mistakenly referred to as shakes, but they are shingles, not shakes. Shingles are sawn, and thus pretty flat and square and uniform. Shakes are split, like firewood is split with an axe, and tend to be chunky and irregular. The grooves on these shingles are cut by a machine on one side, and the backside is flat. The Cedar Shake and Shingle Bureau calls them Certigroove® shingles. Some people call them "raked". They were apparently considered a somewhat upscale but relatively affordable siding in the 40s and 50s. No one seems to be using them on new houses these days, but in the Pacific Northwest they're everywhere on mid century houses.
After tearing off vinyl siding and fanfold (except the part around the doorway)
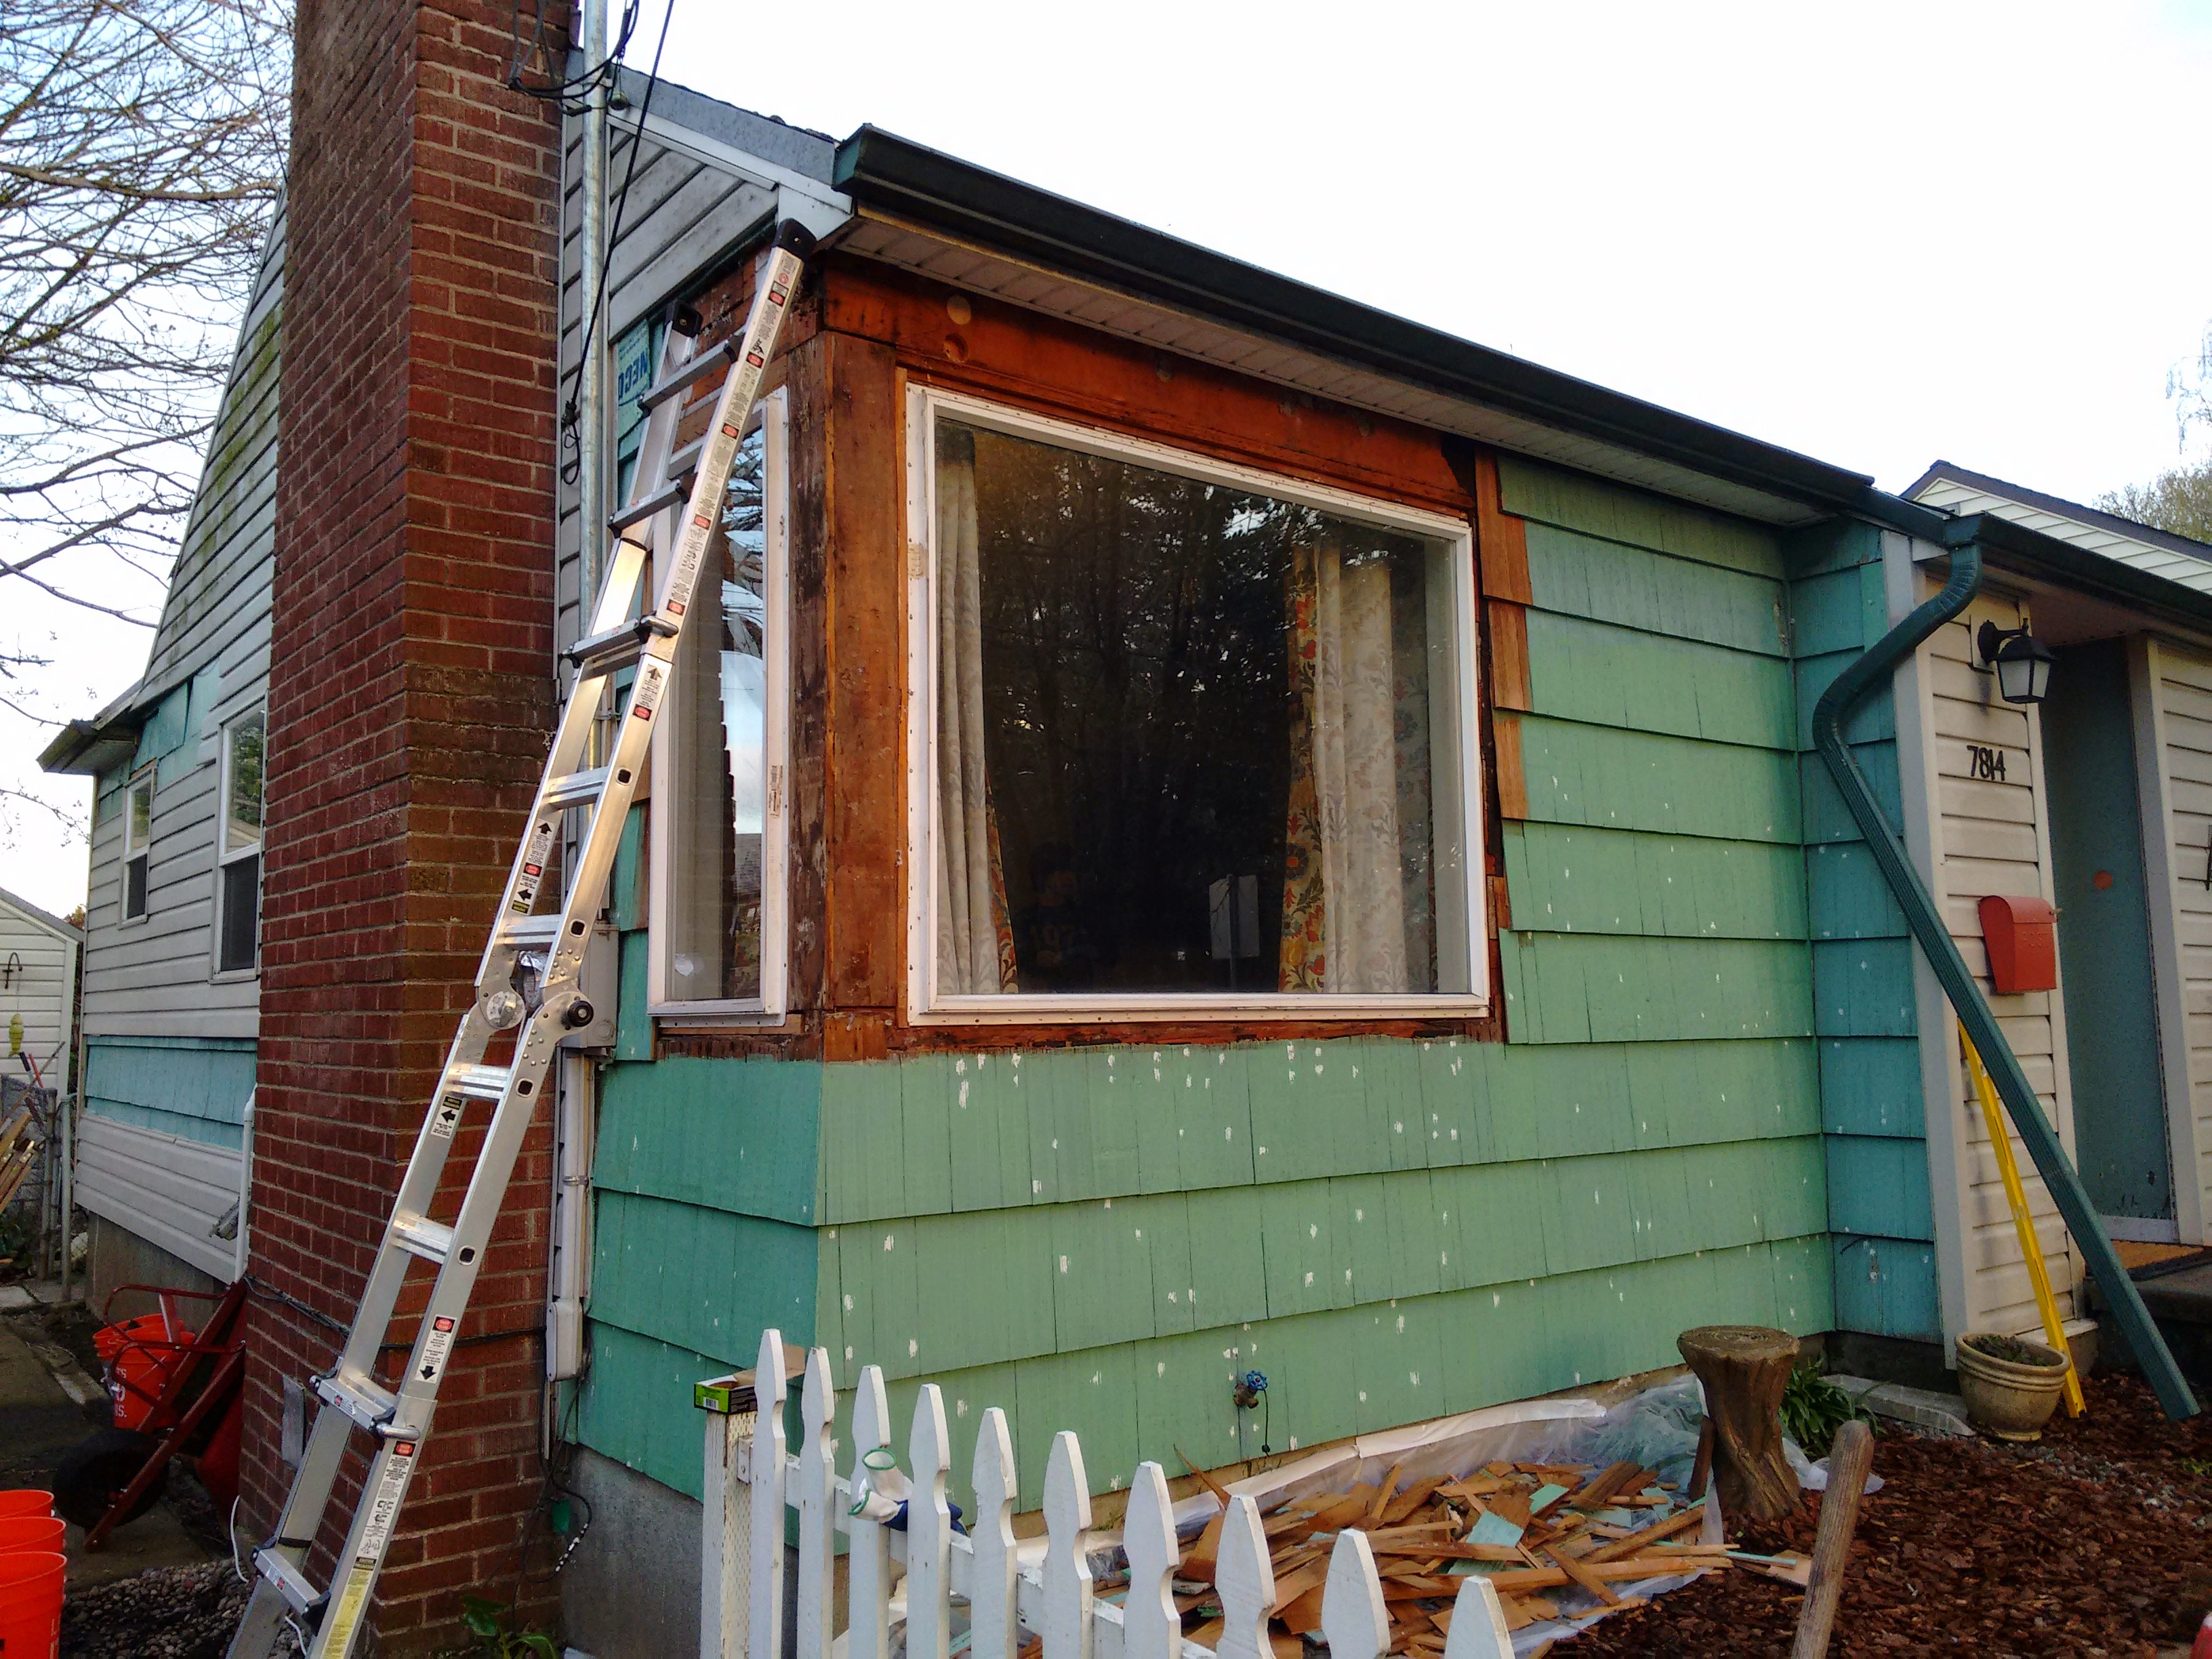
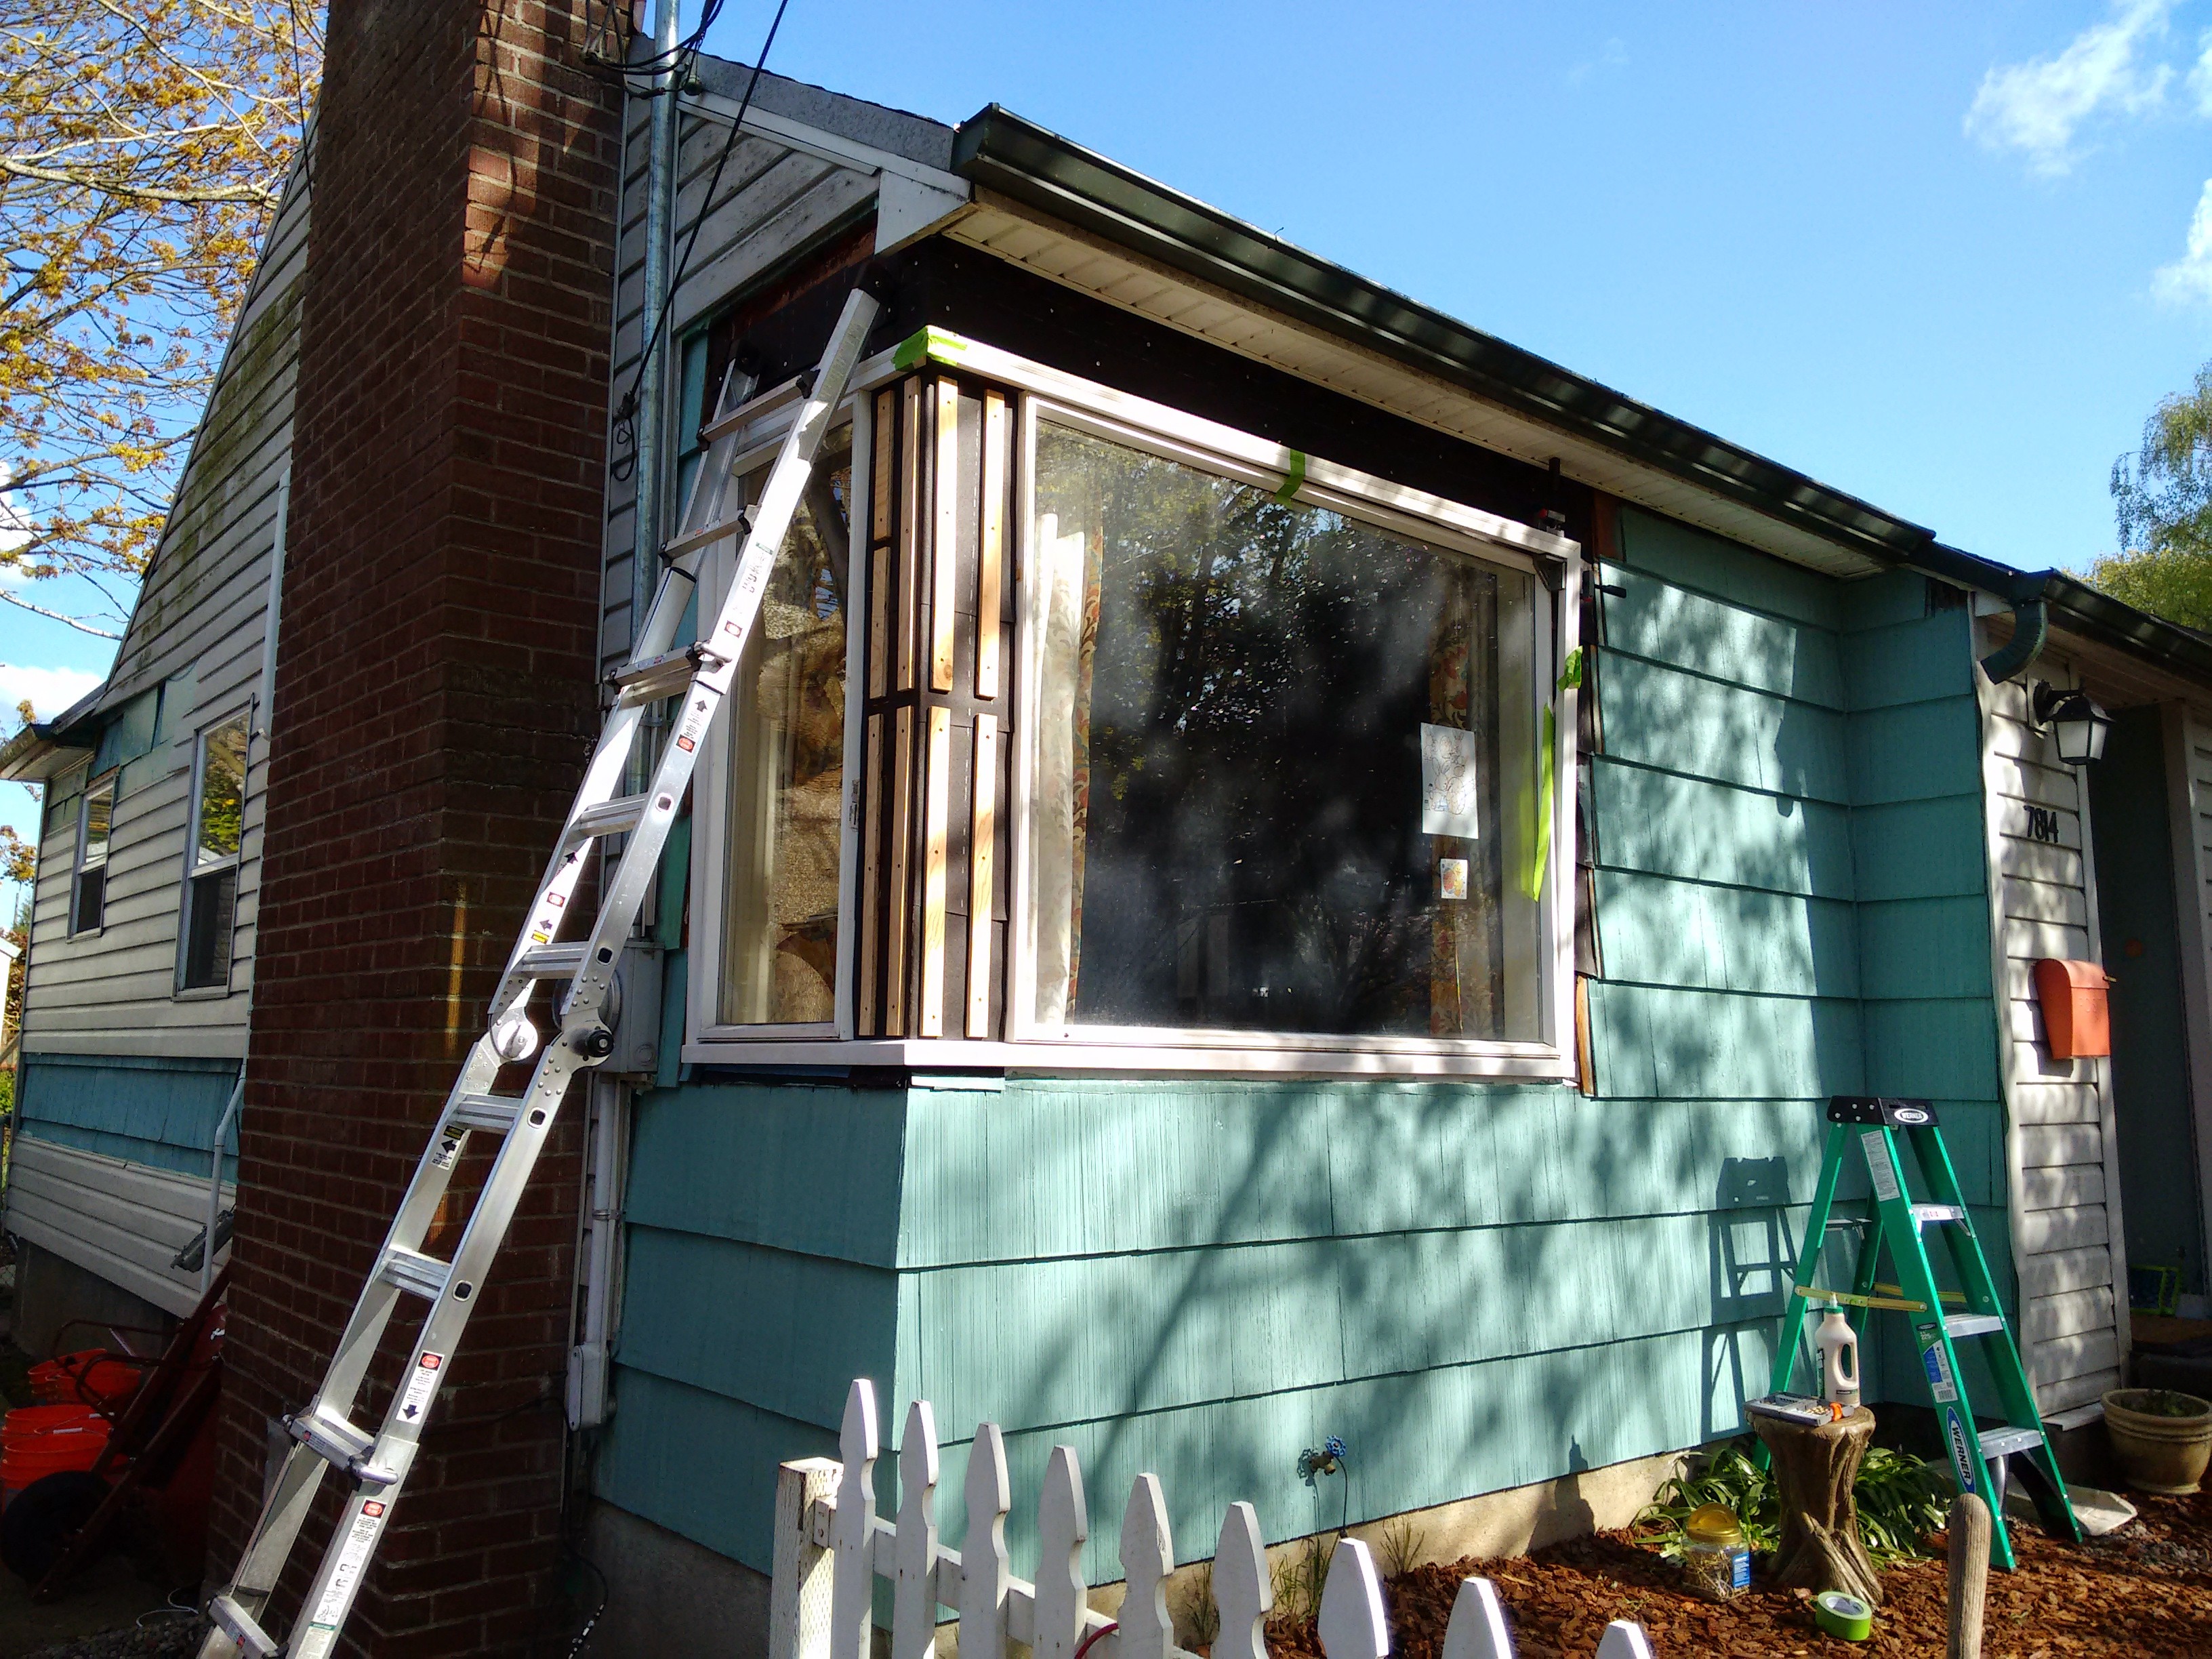
After removing shingles from the corner between the two windows, patching nail holes, and one coat of primer. The vinyl removed back past the chimney was for cellulose insulation we had blown into the wall cavities from the outside.
The thing with shingles and shakes is that the material is not necessarily that expensive, but the small pieces make them labor-intensive to install, and as labor has gotten a lot more expensive over the last half century, shingles and shakes have become very expensive to have professionally installed. The 18" pre-primed grooved shingles I found locally were $80 for a carton that covers 50 square feet. But that 50 square feet is calculated using a 14" reveal. Ours are more like a 12.5" reveal, so (12.5/14)*50 is 44.6 square feet, which makes these about $1.80/sqft. The backing shingles, which are low grade #4 18" non-grooved shingles, were about $16 for 100 sqft, so the total for both layers of shingles is just about $2/sqft.
What's the deal with the second layer of shingles? The more traditional style of non-grooved cedar shingles and shakes are installed with much shorter courses, something like 5 to 8 inches. The vertical seams in one layer are covered up on the layer above it, and the many layers overlapping keep water out. But these grooved shingles tend to be installed in very tall courses, 10-14" or so, with one course only overlapping the next by a few inches. So, to keep the water out, they are doubled up. For each course, you first install a layer of the cheap backing shingles, and then you install the grooved shingles on top of those, with the vertical seams staggered to prevent any water from getting all the way back through behind the siding as it runs down the face of the building.

#4 backing shingles. Notice the knot holes and general haggard quality
how to re-paint old siding with lead paint
Standard advice for re-painting a house is to scrape and remove any loose paint. But that's a bad idea with lead paint, and even if it wasn't lead paint, you can't scrape these grooved shingles -- maybe you could use a wire brush or something, I don't know. But the lead makes that moot. We did not scrape or wire brush or anything. In accordance with the Peel Stop Triple Thick directions, we just painted right over the cracking, peeling old paint. This primer is like pudding. It dries into a glue-like substance that locks everything down. The difference in smoothness and uniformity is pretty incredible, even before paint is put on.
After one coat of Peel Stop Triple Thick thinned with 10% water. This layer is actually the wrong color. Ignore that.

After a second coat of primer, unthinned
window flashing, 2015 style
When the vinyl windows were put in, few provisions were made for potential water leaks. The J-channel was caulked to the windows, and that was it. The windows were shoved into the wood rough openings (some with the old rock lath/plaster returns still in place) and nailed/screwed in. If you spend a little time reading about proper window flashing, you will realize that this is really unwise. What if water gets behind the siding? What happens when the caulk eventually cracks or separates? What if the window itself cracks and leaks? All of these things happen and you should be prepared for them to happen. The window needs a diaper, which is the sill pan flashing. I flashed the sill and jambs with flashing membrane. At first I was using Henry Blue Skin and some random Pella foil-faced flashing tape, which were fine, but then I found some DuPont FlexWrap for cheap on craigslist and that was so much better for the sill. It makes the corners of the sill both easier and more robust -- it just stretches around the corner in one continuous piece. I made sure to fold up the back of the sill flashing to the interior stool trim, making a backdam. I did the best I could to integrate new pieces of roofing felt with the existing, sliding it sideways behind the shingles and old felt. Vertical seams are hard to seal in an ideal way without tearing off a bunch more shingles, so I did the best I could within reason. The felt goes on after the window flashing and laps over it. Everything goes on from bottom to top, overlapping shingle-style.

Window flashing complete (this is a different part of the house)
window trim, 1950 style
With the windows now properly protected, they needed trim. We don't have any of the original trim to study, but there are a lot of similar houses around the neighborhood, so we made a very safe guess that the trim was originally a sloped 2-by sill with brickmould around the sides and top, mitered at the corners. We decided to steal a feature that only some of these houses have: window trim that wraps around the corners of the house. It makes sense because on 3 of 4 corners of our house, we have windows very close to the corner. And we thought it looked cool. Our house obviously did not originally have this, because there were shingles installed where this trim would go.
The window trim goes like this. The sill is a cedar 2x4 ripped with a 10 degree slope to a depth of 1.5". So it's almost like a 2x2, except it's a parallelogram, not a square. It's 1.5" front to back, and 1.5" top to bottom. But the parallelogram shape means that you couldn't make it from a 2x2. You'd at least need a 2x3. I also cut a kerf on the underside to help water drip off. The jambs and head (sides and top) are standard brickmould, made of finger-jointed pine, which is 2" wide by 1 1/4" thick (at its thickest part). The bottom of the jamb has to be cut at a 10 degree angle to match the top of the sill, and the top of the jamb has to be mitered at 45 degrees. The head has to be mitered to mate with the jamb, and also mitered in a different axis to meet with the other head at the corner of the house.
I don't know how the original carpenters went about this, but they must have been much more efficient than me. For a single window, I would construct the whole thing like a picture frame and then mount it on the house, but that did not seem viable for this big awkward three-dimensional structure that has to wrap around the corner of the house. So I did it piece by piece. It was slow and frustrating. I have no advice here yet. It sucks. I did glue and either nail or screw each joint.
The large area in the corner gets covered by panels of 1/2" plywood. To meet with the rest of the stuff at the appropriate depth, I want it to be about 1" thick, so that means two layers of 1/2" plywood. Instead of the bottom layer being a solid sheet, I cut scraps into furring strips. This allowed me to shim the furring strips for better squareness/plumbness, it used a bit less material, and it formed a miniature rainscreen which helps keep everything in that vicinity drier. I did not miter the corner of the plywood panels; I just butted them and used glue and nails. I used sanded plywood for a nice smooth painted surface, and sanded/filled the imperfections to make it nice.
Trim about 2/3 done, with furring strips for corner panels
After the trim is done and the shingles underneath are in place, a strip of shingle moulding is put under the sill. It's just a little decorative touch that some of the houses of the era have, while some do not. The big box stores only carried PVC versions of this trim, which I don't like, but we found some in real wood at local stores. Both Woodcrafters and Mr. Plywood in Portland have it, for a little over a buck a foot. At Woodcrafters it's item H-440. It seems to only be commonly available in Hemlock, so that's what we got.
Above the head trim, especially when it's not right under an eave, it's important to protect it from rain with some metal flashing. The modern technique you'll see on new houses is a metal drip cap that is very visible when looking at the house from ground level. I find that pretty ugly and too function-over-form, so I use a 1.5"x1" metal flashing, with the 1.5" part running vertically behind the siding (actually, behind the felt), and the 1" part running horizontally over the head casing. I bend it slightly by hand so it's not quite 90 degrees, and has a slight slope to shed water. I think this is a good compromise between form and function. Just keep in mind that your head casing will still be exposed to some direct rainfall on its outer top corner, and you should expect to keep it painted and in good shape to protect it. It's literally the roof for the whole window.
More to add... this page is not done.
stuff
Here's the list of products we used. We did tons of research and these do seem to be either the best products in their category, or a very good balance of price and awesomeness. They also all clean up with water, no solvents needed.
- Glue: Titebond III (waterproof)
- Filler: MH Ready Patch
- Caulk: Big Stretch
- Primer: Zinsser Peel Stop Triple Thick
- Paint: Benjamin Moore Regal
- Lead-safe HEPA vacuum: Vacmaster VK811PH
Nick Welch <nickwelch.dev@gmail.com> · github